Friday, August 28, 2009

Box challenge DAY 21


...........62 trays cut and covered-31 rounded forms covered in goat split to 0.3, with 31 spine pieces cut-62 boards cut , back-cornered, and sanded-31 covers split to o.75 , cut and pared.
Case making to follow, but somehow I appear to be a week behind!

Tuesday, August 18, 2009

Box challenge DAY 14


Day 14...board linings and rounding Spine forms.

......the boards cut from an 80pt, or 3mm board, are lined with a smooth bristol board on the outside using PVA.
Now, because we're using these for making leather cases, and because those cases are covered in onlays, I paste and stretch an acid neutral cotton fibre 25lb bond paper across the board, which initially pulls them inwards, but will later help the boards set rigid and flat.
I can't cut the material for making the rounded Spine Forms without first lining the boards as a true measurement can only be taken with the trays between boards.
I use BINDERS BOARD to make the rounds!!!Not Balsa, Not paper,not toilet rolls!!!
It is readily available, easily sculpted in the right hands, and provides a good solid back to the box,structurally sound and good for tooling.
Different strokes for different folks!!
The base board is cut to the width of the trays between boards, then built up by successive possibly thinner boards, in a pyramid.These are glued together, then rather perversely I hand plane them into curve using a kraft knife.
Its not for everyone, but I do like the control it gives me.
After planing, they are then sanded with a 30, 50, or 80 grit sand paper.Use a heavy paper and wear a mask.
These will then be covered, and after that the spine pieces for the cases can be cut, and cases made....over 30 of them......easy, right????!!!
The bristol board and lining paper is available and affordable from Hollinger's, I will post a link in the list of freinds.

Friday, August 14, 2009

Box challenge DAY 10


End of the 1oth day..over 70 trays cut and covered, and lined.
Forms are cut out of scrap board, cut to fit inside the bottom tray.These will be used later in pressing the trays onto the case.
I now cover the forms in an envelope of wax paper to prevent the build-up of hard-to-clean dust and dirt.I don't use wooden blocks as I just prefer to custom cut each form for each box.
A card is wrapped around the bottom tray,again to prevent friction,give "memory" to the walls, so that they dry firm and straight.
Boards were cut, then all was stacked and left to dry.
Some of the boxes are for small items, so the bottoms are "built-up" using a combination of board and foamcore, giving a balance between weight,and structural integrity.
The box for "The Third Man" houses 2 books, the smaller one in a slipcase built-in to the bottom tray, which is made to fit the bigger book, so it can sit in a tray on-top.The lower book can be pulled out with a ribbon.
To come.....board lining, and the hard labour of making the "rounds"...and I've not even touched a piece of goatskin!

Saturday, August 8, 2009

Box challenge DAY 3


Day 3

Bottom trays are covered and a timely delivery from Ernie Schaeffer means that we can cut board for the tops.
Next week we will be making the round forms for the boxes, but the real test will come in gathering enough goatskins to fill the order.....

Wednesday, August 5, 2009

Box challenge DAY 1


I got put on the spot, a 2 month deadline to complete 25-30 full leather design clamshells.
Nothing like a bit of pressure...right??
This will be first, a serious test of edition work, and second, a design endurance nightmare.
So...just for added spice, I thought I'd do it in public, detailing most steps, where possible, along the way.

Design conception and execution will be left to me.

DAY 1
.........Bottom tray cutting for double-walled clamshell.The base is cut, then the walls cut and glued together in a step-joint of a board thickness.(all clamshells made at PDB are double-walled,thin walls are useless)
The trays are made, sanded smooth, then the outside is lined, for extra strength and stability.

Next step.....covering.....

Saturday, August 1, 2009

Mosaic Onlay


I love my micrometre.
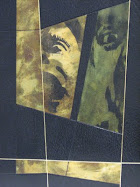
It is the only way to ensure a good, consistent onlay, and the first picture demonstrates the thickness I have found to work best for onlays.Full goatskins used for covering upto certain sizes I now get split to .7-0.75 ...I have found the 0.6 most people get it split to is just too thin, and may compromise strength.
The mosaic style of dying, cutting-out,and onlaying in a grid or other pattern, is a technique worth further exploration....