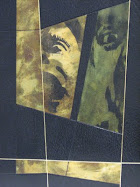


So every now and again I have to do something that is not exactly to my taste , kinda weird looking , but extremely taxing to make , and not at all straightforward . So I had 1 week over chistmas to make a binding for an architecture firm for a pitch they were making to some king(the king??I dont how many there are??)And yes , they want to put some kind of 3D object on the front , have the design carried over onto the back board , yes its span when open is a massive 18x50(thats inches folks)BIG , and yes its in silver.......i tried , believe me I tried .
first is the size , cant get that out of one skin , im going to have to join . They say they dont want to see a seam on the board , OK.....What about a 3 phase binding .......
The book is forwarded , sewn , rounded and backed lined , and a hollow put on . next are the boards .I`m doing
split boards , so I have to work out how deep to make the recess , to sink the 3d object(now covered in fair goat split to 0.3)I work out that if I use .8 board for the top i can hollow that out, and glue that ontop of a .6 which still gives me enough weight for support, whilst being deep enough for the object. (which is made of resin=heavy) ....
So then next i have to use a strip to cover the spine , extend over the edges , and down onto the thinner board , which has had a portion knotched for the tabs to sink into .This knotching I do for the edges , and the inside of the board....this will make sure we don`t get any unsightly turnins around the joint areas of the spine , resulting from the subsequent build up of material.
follow me?
Before glueing the second board down , the skin is pared , and the area along the spine glued to the underneath of the board , then pulled across the board , and the recess rubbed-in , the turn-ins are left open.(so that only the edge along the spine is turned-in)
Now , each of the books has a long stamp on the top right corner , so this is done when dry(ish)If they didnt need to be stamped , i guess you would fix the board into place before glueing down .Anyhow they are stamped , then glued ontop of the smaller board.
The turn-ins of the outer board are turned-in ontop of the turnins at the spine area of the smaller board , and the corners are made the usual way . On boards that are thicker , you would probably have to do the vellum binding method (that is , cut the corner with a square tab and fold it underneath the foredge - the foredge is cut so that it runs along the edge of the board so your edge paring has got to be good if its to be neat)
NB it is usefull if you make the foredge cut of the outer board a little shorter and position it away from the joint and the edge of the second board , so that opening is not restricted .
Once nipped the book taken out and both pieces glued down, the head , tail and foredges of the boards can be turned-in and pressed .After that .....onlays and tooling . The pattern is drawn-in using a folder , then hot tool . The area to be onlaid has to be sanded to remove the weird coating on the silver kid , then on they go.
but wait....How hot is it on the tarmac of the UAE ?and its flying in 2 days....!!!so just because im a bit weary they are put down with a mix of 70/30 pva and paste.(normally thats all paste)The book is cased-in , and the object glued into the recess after it dries over-night .The books have clamshells lined in suede , with the verso lining made with hollowed out foam core , that takes the shape of the raised 3d object.
NB if you want to make linings for objects like tubes say or glass vials , or even weird 3d objects made of resin and covered in goat,
suede or skin is a good material to use . Hollow out the foam core appropriately paste the lining out and cover , then take the object your recessesing and position it in the core , when dry , the lining has moulded to shape perfectly .
I used this method effectively on my Little Black Box of Afflictions some years ago.
so the end result is OK , like I said, not exactly what I would have liked to have done,but I guess sometimes its not about whether you like the finished article having worked to someone elses specs... maybe its about what you can learn along the way.
The whole job was completed 27th december to 2 jan `09 , and i had to take a week off afterwards to recover .
I will post more on split-board bindings in the future , such as harrison grooved split-board , more 3 phase , and the split-board case bindings i made on contract work for the
british library.....
stay tuned.


